How to Fix Blurry YouTube Thumbnail in 2026 — 5 Easy Steps
Is your YouTube thumbnail blurry after uploading? This is one of the most frustrating problems YouTube creators face. A blurry or pixelated thumbnail makes your video look unprofessional and can seriously reduce your click-through rate. The good news is — fixing a blurry YouTube thumbnail is simple once you know the cause. In this guide we explain exactly how to fix a blurry YouTube thumbnail in 2026 with 5 easy steps.
Why is Your YouTube Thumbnail Blurry?
Before fixing the problem you need to understand what's causing it. There are 5 main reasons why YouTube thumbnails appear blurry:
- Wrong image size — uploading a thumbnail smaller than 1280x720px
- Low quality export — saving as JPG with low compression settings
- YouTube processing — thumbnail still being processed after upload
- Slow internet — YouTube serves lower quality on slow connections
- Wrong file format — using formats that lose quality during compression
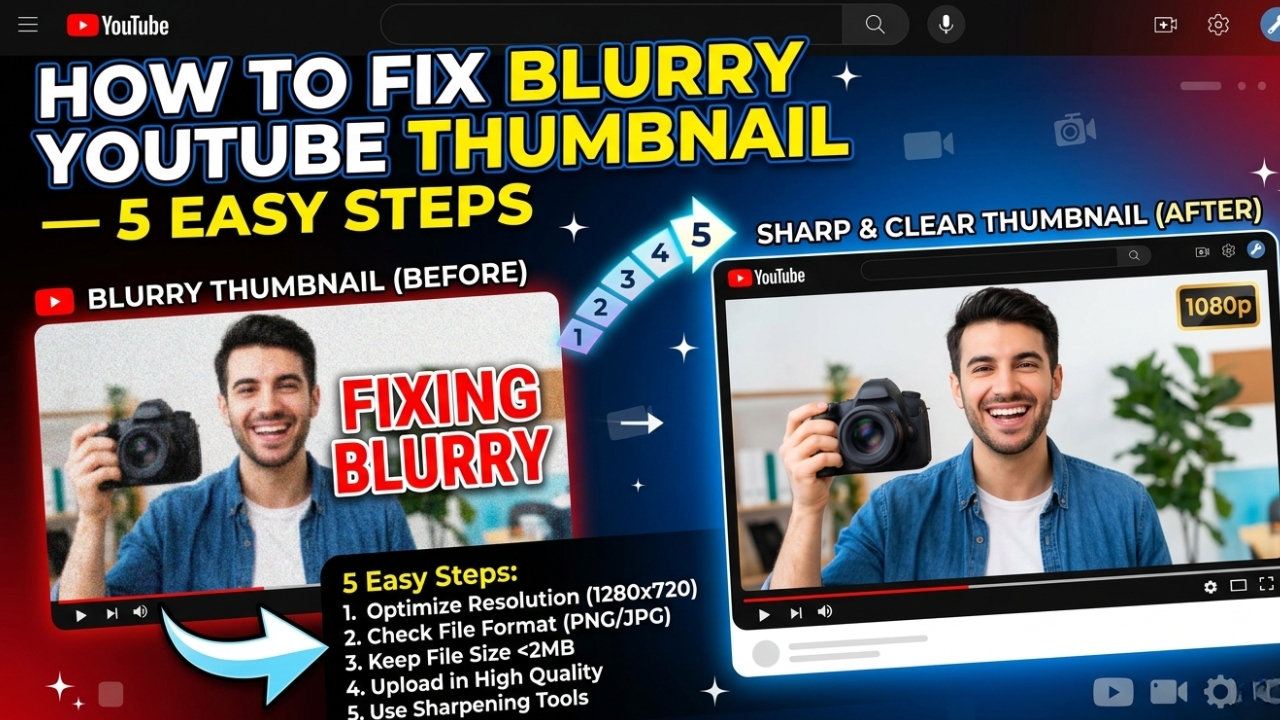
How to Fix Blurry YouTube Thumbnail — 5 Steps
Step 1 — Use the Correct Thumbnail Size
The number one cause of blurry YouTube thumbnails is using the wrong size. YouTube requires a minimum of 1280x720 pixels with a 16:9 aspect ratio. If your thumbnail is smaller YouTube will stretch it to fit causing blurriness.
How to fix: In Canva click Custom Size → enter 1280 width and 720 height → design your thumbnail at this exact size. Never resize a small image to 1280x720 — always design at this size from scratch.
Step 2 — Export in High Quality Format
How you export your thumbnail matters as much as the size. Many creators accidentally export at low quality settings causing the thumbnail to look blurry even at the correct size.
How to fix: Export as PNG for maximum quality (no compression). If you must use JPG set the quality to 90-100%. Never go below 80% quality. Keep the file size under 2MB.
Step 3 — Wait for YouTube Processing
After uploading a thumbnail YouTube needs time to process it on their servers. During this time the thumbnail will appear blurry or low resolution. This is completely normal and temporary.
How to fix: Wait 30 minutes to 2 hours after uploading before checking the thumbnail quality. Clear your browser cache (Ctrl+Shift+Delete) and refresh the page. The thumbnail should update automatically to full quality.
Step 4 — Re-upload the Thumbnail
If the thumbnail is still blurry after waiting the best solution is to re-upload it. Sometimes the initial upload gets corrupted or processed incorrectly.
How to fix:
- Go to YouTube Studio (studio.youtube.com)
- Click Content in the left menu
- Find your video and click the Edit pencil icon
- Click on the current thumbnail
- Click Upload thumbnail
- Select your high quality thumbnail file
- Click Save
- Wait 30 minutes and check again ✅
Step 5 — Check Your Internet Connection
Sometimes the thumbnail itself is perfect but it appears blurry because YouTube is serving a lower resolution version due to a slow internet connection. This is YouTube's automatic bandwidth optimization.
How to fix: Check your thumbnail on a fast WiFi connection. If it looks crisp on WiFi but blurry on mobile data the issue is your connection speed — not the thumbnail. Viewers with fast internet will always see the full quality version.
How to Check If Your Thumbnail is Actually Blurry
Want to see exactly what your YouTube thumbnail looks like in its original quality? Use our free tool to download and inspect any YouTube thumbnail:
- Go to YTThumbnailGrabs.com
- Paste your YouTube video URL
- Click Get Thumbnails
- Download the Full HD version
- Open it on your computer and zoom in
- If it looks sharp here — the issue is YouTube's processing or your connection
- If it looks blurry here — you need to re-create and re-upload at 1280x720px
Perfect Thumbnail Settings to Avoid Blurriness Forever
- ✅ Size: 1280 x 720 pixels exactly
- ✅ Aspect ratio: 16:9
- ✅ Format: PNG (best) or JPG at 90-100% quality
- ✅ File size: Under 2MB
- ✅ Color mode: RGB not CMYK
- ✅ Design from scratch: Never stretch a small image
- ✅ Font size: Minimum 60pt for any text
Conclusion
Fixing a blurry YouTube thumbnail in 2026 is straightforward when you follow these 5 steps. Always design at 1280x720 pixels, export as PNG or high quality JPG, wait for YouTube to process, and re-upload if needed. To check your thumbnail quality instantly download it using our free tool at YTThumbnailGrabs.com — see exactly what YouTube is showing viewers in seconds.
Related Resources
- ⬇️ Download YouTube Thumbnails Free — Use Our Tool
- 🔍 Why is My YouTube Thumbnail Blurry?
- 📐 YouTube Thumbnail Size Guide 2026
- 🎨 Best YouTube Thumbnail Background Colors
- 🎨 How to Create Clickable YouTube Thumbnails
- ⬇️ Best YouTube Thumbnail Downloader 2026
- 📱 Can You Upload Custom Thumbnail for YouTube Shorts?